
This guide covers a range of strategies, tactics, and information on succeeding in the game. Some of the details, especially the mission overviews, may contain some spoilers. So you may want to skip some parts if you prefer to figure things out on your own. Lets start with some basic principles to keep in mind for the game. Pay close attention to the mission briefings in the campaign. They often provide specific details you will need to apply in order to maximize your chances of success and completing the objectives. Some missions may not require destroying every ship in the area while others may require you to maintain a specific location. Follow the instructions carefully and watch for clues that can help complete the required objective(s). In many missions, it's important to allow your wingmen to join in formation with you before engaging the jump drive. Otherwise, you'll risk leaving them behind and significantly out of range by the time you arrive at a waypoint. And it's also important to fly slow enough to allow them to align their formation at low speed when it is easier to adjust course and avoid collisions. Once your wingmen are in formation, you can then engage the jump drive and all ships should be able to remain in formation through the entire jump cycle. Remember that events can change during a mission and the same mission may play out differently each time. When AI ships decide to fire missiles and the flight paths they choose can vary greatly. Remember that you can change the difficulty in the Options menu if you encounter a scenario that is too difficult or easy for you. You can also change the difficulty during the mission if you want to in the exit menu. Always be sure to avoid being destroyed after completing or failing a mission. This can result in a mission progress penalty, forcing you to go back and replay the previous mission you completed. Fly back to the carrier carefully and be sure to land, even if you failed to complete the objective. Some missions may advance even if you fail the objective, depending on the specified campaign pathway in the mission file. You just need to be sure to make it back to the carrier and land safely. 
Mission 1: Learning the Ropes This first campaign mission is a relatively easy two waypoint patrol. You'll fly a scout and lead a wing of three other spacecraft. This is a useful mission to familiarize yourself with issuing orders and formulating attack strategies that increase the chance your wingmen will survive the battle. The limited number of missiles carried by the scout ship you fly makes the mission a bit more challenging. It's generally best to try and save the missiles for the second waypoint and primarily use cannon weapons to eliminate each target. 
Mission 2: Scanning Orion This is a delivery mission where you are required to transport a satellite to a waiting transport. An indicator box will be displayed below the ship to guide you to where you need to drop off the satellite by jettisoning your ship's cargo bay at that location. This mission does not require engaging enemy spacecraft (delivery of the satellite being the priority), as the briefing implies. What is important is disengaging the jump drive at the right time to avoid giving intercepting enemy spacecraft time to destroy the waiting transport and/or attack your wing. As you get closer to the planet where the transport is waiting, the gravity field from the planet will disrupt the jump drive's energy field causing your ship to gradually slow down as you approach. This has the benefit of giving you a little more time to react and disengage the jump drive at the correct time. Try to place your arrival from jump drive speed as close to the transport as you can without flying past it. Then fly into the indicator box below the transport and jettison your cargo bay once inside. If you succeed, the transport will take the satellite and immediately jump away to safety. You can then turn around and return to the carrier. Be sure to keep your speed high enough to avoid incoming gun and missile fire from the enemy ships, then once your jump drive is ready, jump back to the carrier. 
Mission 3: Building Orion This mission involves mining 25 units of metal ore from nearby asteroids and returning the material back to the carrier. Keep your wingmen in close formation so that when the enemy ships jump in for an attack, you can be ready to order them to engage. Also, try to get to the waypoint as quickly as possible, but be careful not to jump past the asteroid field nor collide with an asteroid. This will provide you with a little more safe setup and mining time before the enemy ships arrive. Once the enemy ships jump in, order your wingmen to attack and you should generally be safe to continue mining while they defend you. But always keep an eye on the radar and use the target range list mode to watch for any threats that may be moving in to attack you. You may also want to check the tactical console periodically to watch for any of your wingmen reaching critical damage and be ready to help by joining the fight. Once you have retrieved 25 units of metal ore, a new waypoint will be automatically set for you to return to the carrier. Further combat is not required unless you want to finish off any hostiles in the area. 
Mission 4: Springing the Trap This mission is a major turning point in the campaign. It initially unfolds as an intercept objective against an enemy convoy passing through the area, but soon turns to a surprise ambush from unexpected Vonari forces. If you engage the enemy convoy early on, it may be more difficult to survive once the Vonari start to arrive as you can then have both groups of enemy forces attacking you (depending on positions and proximity). So try not to allow yourself to be caught in the middle of a battle throughout the entire mission. Instead, remain at the edges and perform high speed fly-bys to avoid reducing your speed down to more vulnerable levels. It's also generally best to keep your wingmen in formation most of the time, with just the occasional quick attack against lone enemy fighters if the opportunity becomes available and you decide you want to. But otherwise, it's best to remain as a group flying around the perimeter of the battle area as the mission progresses. At one point, the mission commander will also issue an order to you over the radio to stand by, indicating you no longer need to be engaged in battle. As the Vonari arrive, the enemy Federation forces will generally engage the Vonari forces, leaving you free to continue flying a perimeter pattern around the battle area. Vonari capital ships will eventually destroy the Federation capital ships, effectively completing the objective for you. With limited numbers on site and no reinforcements, it's not practical for you to engage the Vonari forces. Eventually, the radio call will come in for you to return to the carrier. 
Mission 5: Time in the Wilderness As a defensive move after the Vonari attack, your fleet escapes to a nearby nebula cloud for cover. Upon arrival, intermittent signals suggest the Vonari may be in the area and you are sent to investigate. You are given command of a squadron and assigned the best ships in inventory, the Evoch-C. While the mission may seem easy at first, it can still pose a challenge and generally requires giving orders to your wingmen at the right times along with careful attack patterns, spacing, and weapon use. It's easy to get trapped in the middle of the Vonari ships at both waypoints, so try to avoid allowing the to happen and try to pick off one enemy ship at a time while your wingmen engage others. Keep an eye on the tactical console and be sure to move in to help any wingmen that may sustain significant hull damage. You may also find it effective to order your wingmen to attack together against a particular Vonari ship that is closest on a first pass. Then afterward, whether the Vonari ship is destroyed or not, order them to form up again and try to repeat the process until you can get the enemy numbers down low enough that mopping up the rest is far more practical. Use missiles sparingly and only when you have a direct line of attack when a missile can be most effective, rather than at an above or below pursuit angle. 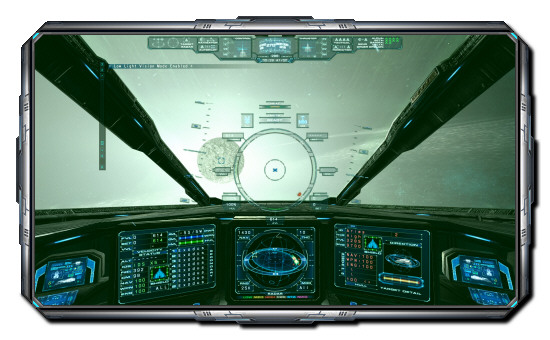
Mission 6: Water in the Desert As the mission name implies, this objective is about resources. Having been away from resupply and reinforcement support for so long has drained the fleet of much needed resources, including fuel. The most practical source of fuel in the area is a nearby star, which you are assigned to fly close to in order to harvest the particles necessary to resupply the fleet. Your ship's shield systems will protect you from the high radiation and heat from the star, but it's important to not get too close as that can eventually destroy your ship. A waypoint is provided as part of the mission to give you a guide for a safe location to harvest the particles. But the closer to the star you get, the faster you can retrieve particles as their density gets greater. It's best to completely ignore any Vonari ships that may attempt to intercept you during this mission and just focus on retrieving the needed particles from the star. You can keep the IDS scale setting very high and skim an area near the star at high speed. Just be careful not to fly too close to the star to avoid damage. Once you have the required level of fuel on board, turn around and engage the jump drive to return to the carrier. 
Mission 7: Hired Guns This objective requires you to fly out and meet intercepting Vonari ships near the waypoint, just outside of the nebula cloud. The fleet will escape once they leave the nebula, which is about 8 minutes from the time the mission starts. As events unfold, more enemy reinforcements are called in, making it extremely difficult for you to destroy all of the ships before the fleet's departure time. So rather than attempting to eliminate them all, you simply need to provide cover and keep the enemy ships distracted so that they don't work their way back to the fleet ships. You may be able to pick off a few hostiles from time to time, but it's most important to watch the mission clock and stay alive. Fly fast, avoid being hit by enemy weapon fire, and keep them distracted and away from the fleet. Then once the mission time reaches about 7:00-7:30, fly back quickly to the carrier to land (short jump burst as needed). Be sure to enter the hangar before the 8:00 mark, but not before the mission complete notification. The high speed landing practice stage in training can help in preparation for this mission. 
Mission 8: Deepening Mystery This is a long range patrol with three waypoints. For the first two waypoints, the objectives are simply to destroy enemy ships. By the third waypoint, arriving allied ships will need defending from enemy attack. Timing is important on this mission for proper completion. Time disengaging your jump drive at the third waypoint so that you are very close to the allied ships. If your arrival point is too far away, the enemy ships may decide to focus their attack on the allied ships. If you do arrive too far away, be sure to put yourself between the enemy ships and the allied ships as quickly as possible to protect them. This mission is fairly forgiving in terms of time and objectives, but is still an important one to do well on for ranking/stats with the number of enemy ships and waypoints involved. 
Mission 9: Warriors and Builders This mission requires you to place construction modules in a fixed pattern in preparation for building a space station in the system. To do this, you must retrieve each module from its deploy unit with your ship's tractor beam, then position the module in place where the box shaped highlight marker on your HUD indicates. While carrying a module, your forward visibility will be obscured, so be sure the path is clear and watch your radar and HUD to guide you to the nav marker. You can also use an external view as desired. Enemy ships will arrive in waves, so you'll need to be ready to issue orders and assist your wingmen as needed. You can generally place one or two modules before the first wave arrives. Once the Vonari ships warp in, issue orders to your wingmen to attack. It's helpful to anticipate the arrival of the enemy ships and be in a good formation for an attack run against them. This is where the campaign will expect you to have learned issuing command directives such as 'Hold at NAV' and 'Form Up' at specific points during a mission. At times, you may want to fly in as bait to distract the enemy ships so your wingmen have a better attack approach at an indirect angle against them. Boost power to your shields and keep your speed high, but fly close enough to pull one or more away so that they chase you instead of flying in directly toward your wingmen. Try to keep them distracted this way and fly arc patterns to keep them in range so your wingmen have more time to attack with cannons and missiles. At times, one or more might turn away to attack your wingmen, giving you the opportunity to move in for an attack. This mission can require some practice to time attacks and build operations correctly as events unfold. Once all 12 modules are in place, the mission will be completed and you can return to the carrier. 
Mission 10: The Hunter and the Hunted The mission briefing will explain that the war with the Federation has ended due to the new threat from the Vonari and joint military operations are planned for the future. It also explains that the resupply has provided new ships, weapons, and technology to the fleet. You have access to the Evoch-E fighter for the first time in this mission along with the cannon relay. The mission objective itself requires defending the fleet until it is safe for them to jump away. While similar to the previous objective of the same type, the enemy numbers and frequency are higher in this mission as well as a longer timeframe before jump (12 minutes). So be prepared for a longer duration defensive engagement. It's recommended that you plan your return so that you can be on approach to land by mission time 11:30 and in the hangar with time to spare before the 12:00 mark. 
Mission 11: A New Frontier Upon arriving in the Arvoch system, Vonari ships are detected on long range sensors and you are ordered to intercept and destroy them. While the objective seems fairly straightforward, the battle soon becomes more challenging as enemy reinforcements begin arriving to assist the original Vonari strike group. Careful planning and orders are important for this mission. You may want to try different ship/weapon configurations in the loadout menu as part of your strategy. It's important to make it to the distant waypoint as quickly as possible which will give you more time to take out as many of the initial Vonari strike ships as you can. Launch from the carrier on afterburner, adjust course to the waypoint, then as soon as the other ships in your group have formed up, engage the jump drive. Drop from jump drive at around 40K and using tactics previously reviewed, try to take out as many of the Vonari ships as quickly as you can. More destroyed early on will result in fewer to have to contend with when the reinforcements arrive. Once you have destroyed all enemy fighters, the waypoint will be reset back to the carrier and you can return. 
Mission 12: Where the Land and the Sea Meet This is one of the most difficult missions in the game. And it may take several attempts employing different strategies to finally complete. You are required to descend to the surface of Arvoch and destroy an enemy base. Relying on your wingmen for this mission is very important as you may not be able to destroy the base on your own, depending on your attack strategy. The key to this mission is the Exodus missile for the best chance at inflicting the most damage on the base. At the start of the mission, launch and fly out to the front of the carrier at fairly low speed. Allow your wingmen to join formation fairly close so that you can stay together as a group. Once in formation, point your ship toward the waypoint or to a location well above it out in space. Engage the jump drive and allow it to remain on until you get close to the destination and/or are near the atmosphere at about 10,000 altitude. You can approach the base at the waypoint directly or from above, depending on what kind of strategy you want to use for your attack run. It's generally best to perform a fast attack bombing run. The base will fire missiles and cannons at you as you approach, so be ready to augment shield energy and launch countermeasures as needed to minimize damage to your ship. The base's flak cannons will also be a threat. Keep your speed at around 3100-3200 right under the limit of atmospheric burn. Once you are in missile range, fire all Exodus missiles in one pass. If you time your attack carefully, you can usually get within primary weapon range at about the same time your missiles begin impacting the base. Once you reach primary weapon range, deplete the base's shields with beam cannons first if its arrays are still above critical, then follow up with particle cannons as may be needed. Don't be alarmed if you collide with the base, you can often still survive by turning away and engaging the afterburner to escape the base's weapon range. But be careful to keep your speed within safe atmospheric range (less than about 3200). You should generally be able to bring the base's hull status down to at least about 30-50% on your first pass, if not completely destroy it. After that, if the base is still standing, you will usually need to depend on your wingmen to finish destroying the base. You can time ordering them to attack it with the 'Attack Target' command when they are close to it. But also remain aware of the hostile ships in the area that will try to draw them away and attack them. You'll want to carefully select the timing of your orders depending on damage levels and spacing. Once the base is destroyed, focus your efforts on regrouping your wingmen and escaping back into space. Avoid engaging the Vonari ships in the atmosphere and keep your speed high enough to avoid their weapon fire. Once you are back in space and your jump drive is ready, jump back to the carrier. Depending on how the mission unfolds, you may find that some Vonari ships have jumped near your fleet as you return. You can optionally attack them or simply land and finish the mission. 
Mission 13: Setting the Trap This mission is fairly straightforward, but can be tricky under certain conditions. Your primary objective is to destroy all but one of the enemy fighters. So an important step to complete is to order your wingmen to form up once all but one of the Vonari fighters have been destroyed. Otherwise, they will likely continue the attack and destroy the remaining ship. So watch for the status of hostile ships in the area and once only one of them remains, order the other ships to form on you, then attack the final fighter with Lynx missiles until its engine is severely damaged. Most of the time, the default loadout for this mission works well. However, you may want to replace a few Starfire missiles with additional Lynx missiles in case the remaining Vonari fighter effectively evades more than the two Lynx missiles included in the default loadout. Once you succeed in leaving one Vonari fighter behind, the mission will finish and the waypoint will be set to the carrier to help guide you back. 
Mission 14: Eye of the Storm This is another relatively challenging combat mission in the campaign. You are required to fly to three waypoints inside a gas giant planet and destroy any Vonari ships you encounter. The winds from the gas giant will often blow your ship off course, so you will frequently need to perform course corrections as you fly to each waypoint and engage in battle. While on route to each waypoint, the autopilot can help keep your ship lined up on the right course. It's important to utilize that system during this mission to help minimize higher fuel consuming course corrections. Fuel is an important resource on this long range mission. So once you reach a target velocity toward a waypoint, disengaging the IDS while on autopilot can help preserve fuel. And your ship's jump drive will not be available for a fairly long time after a jump, so you'll be on lower speeds for much of the mission's flight time. Once you arrive at a waypoint, you may have to search the area a bit to locate Vonari ships. Also, be careful not to drift too closely to the center of the planet as the high pressure can destroy your ship. 
Mission 15: Wolf in Sheep's Clothing This is an intercept objective using the captured Vonari fighter from mission 13, which you now get to fly in this mission. The goal is to sneak in near a Vonari capital ship passing through the area and scan it for valuable tactical information. Since you are flying a Vonari fighter, it is expected that the enemy ships in the area will simply ignore you. To complete the scan, you'll need to fly in very close to the capital ship at the waypoint. It's generally best to fly in close to the central structure of the ship (in between its main engines and central hull) and fly next to it at about the same speed it is travelling. If you exceed scanning range, you'll have to move in closer and start over. If you take too long to complete the scan, the Vonari ships will eventually detect you, turn hostile, and attack you. So it's important to reach and maintain scanning distance quickly, finish the scan, and escape before they detect you. Once the scan is complete, the waypoint will be set back to the carrier. 
Mission 16: Liquid of Life For this mission, you'll be required to recover 25 units of water from a nearby planet. After launching, fly toward the indicated waypoint and locate water on the surface. Vonari ships will be waiting nearby, so you can offset your arrival point to put some distance between your ships and the hostiles. Try not to engage the tractor beam while near a shoreline or over land as you'll likely just recover some other material that will need to be jettisoned so you can make room for the 25 units of water. Avoid engaging any Vonari ships that may be in the area, unless you want to try and eliminate them as part of the mission. Otherwise, fly fast enough to keep them at a distance and skim the water's surface as you recover the required number of 25 units. You can instruct your wingmen to attack and/or fly to a location farther away that might be safer to recover the water. Once you have 25 units of water, the waypoint will be placed at the carrier for your return. 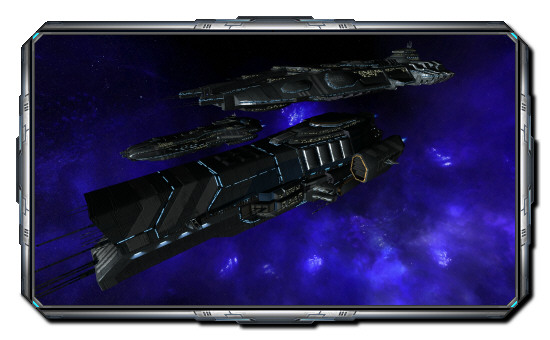
Mission 17: Planning the Escape This defense mission requires you to provide cover for the fleet as it prepares for a jump to the Olympus system at mission time 9:00. Be sure to make it back to the carrier and be inside the hangar with time to spare after protecting the fleet. Again for this mission, you don't need to destroy every enemy ship in the area, your primary objective is to simply protect the fleet and prevent any friendly vessel from being destroyed. 
Mission 18: Civilian Protection There is a clue in the radio chatter for this mission that helps make it easier to complete. When the directive is given to take up formation and protect the transport, that will help make the task easier. Staying close to the transport forces the Vonari's jump arrival point at a distance where your squadrons are in between the enemy ships and the transport. This makes it more difficult for the enemy to move in directly to attack the transport. Flying close escort can also include the transport's defenses in the battle. If you employ proper spacing and timing, you can include the transport's weapons without putting the ship at much risk. Once you have successfully protected the transport from the Vonari ships, you can return to the carrier and land. 
Mission 19: Joining Forces This mission will generally require you to destroy many, perhaps even most of the Vonari ships. So select your preferred cannons and missiles before launch. You will have two minutes and thirty seconds to arrive at the waypoint. If you fail to reach it in time, the mission will fail. So be sure to launch quickly from the carrier hangar, align with your wingmen in formation, then engage the jump drive to reach the waypoint quickly, which will be located behind the carrier's position. Once you arrive, wait for the allied ships to arrive, then take up close formation. It is generally best to keep the original waypoint to one side of the capital ships with your squadrons in between. This provides a better opportunity to intercept incoming hostile ships when they warp in. They will generally try to warp in away from your ships relative to the waypoint's position, so staying between the capital ships and the waypoint is an important tactic. The waypoint will remain marked with the nav point marker if you don't move it after you arrive.
Mission 20: Standing United This mission is another build objective, this time near Olympus Prime. Like the earlier mission, careful orders and preparation can be effective for success. Watch the tactical console and be prepared to stop module placement as may be needed to assist in defense against arriving Vonari ships. 
Mission 21: Escape to Cerulean As the allied ships move to intercept retreating Vonari forces in Cerulean, an enemy blockade near the planned jump point has been put in place to try and delay the fleet's departure. You're assigned the task of punching through the blockade by destroying the Vonari ships it consists of to clear the way for the fleet to reach Cerulean. As part of this mission, access to the Chimera heavy attack spacecraft is provided. 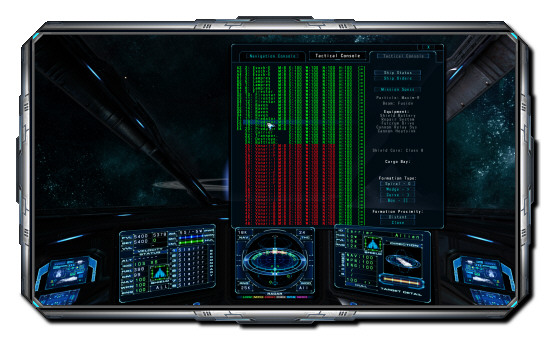
Mission 22: Vonari at the Gate Upon arriving in Cerulean, your fleet is ambushed by a waiting Vonari intercept group consisting of numerous enemy fighters, interceptors, and bombers. This is a short range, high intensity combat furball that can be challenging to complete. Most of the other small allied ships will not likely survive the battle and you'll need to perform well to try and destroy as many Vonari ships as quickly as possible to minimize losses and improve your chances of success. All elements of energy management, weapon selection, issuing orders, and combat tactics are important to do well in this mission. You may find it effective to try and pick off one or two enemy ships at a time. Also, try to avoid getting surrounded and trapped while flying at low speed. Keep your ship's velocity high and perform quick attack passes with pauses sufficient to give your weapon system and shield system time to recharge as may be needed. 
Mission 23: Success at a Cost A mystery surfaces as to how the Vonari knew exactly where the fleet would arrive and when. The fleet has had to fall back to the Atlas system after the attack in Cerulean and now begins the process of trying to rebuild and restore at least some of what was lost. Your objective is to recover 25 units of metal ore and return it to the carrier. During the course of the mission, Vonari ships will arrive to attack and two more wings of allied ships will arrive at about 3:00 into the mission. It's very important to watch for the allied ships to arrive and then issue orders to them to engage. You can do this by either watching the radar for their arrival, or the tactical console. One option is to delay your arrival so that you reach the waypoint at about the 3:00 minute mark so the allied ships are there when you arrive for maximum numbers of friendly ships engaging in the battle at the same time. Issue orders carefully as needed and watch the asteroids carefully to avoid colliding with them during combat and mining. Once you have 25 units of metal ore, you can return to the carrier. 
Mission 24: Lost at Sea This is a rescue mission to recover a pilot that had to eject while inside a gas giant planet. The extreme weather conditions prevent a traditional search and rescue operation. Instead, you are required to locate the pilot's escape pod, recover it with the tractor beam, then return the pilot safely back to the carrier. Engaging enemy ships during this mission is optional. As before, avoid getting too close to the center of the gas giant to avoid the high pressure that can destroy your ship. To complicate the operation, the rescue pod containing the ejected pilot is near the high pressure region of the gas giant, resulting in the potential for atmospheric burn if you fly at high enough speed. So you will need to balance how fast you fly with sufficient speed to avoid missiles and incoming weapon fire from hostiles in the area. The escape pod is also very small and difficult to spot visually. But with a proper approach using the purple radar contact as a guide, it can be retrieved while still flying at relatively high speed. 
Mission 25: Hunting Down Traitors The mystery hinted at earlier in mission 23 is revealed in this mission as a rebel Federation splinter group that believes any efforts against the Vonari would be futile. In an effort to distract the Vonari, the rebels forwarded sensitive tactical data about your fleet's arrival to them, allowing Vonari forces to mount an effective attack. The objective in this mission is to destroy the traitors before they can escape the nebula cloud they are hiding in. The nebula cloud generates a high amount of electrical interference, which prevents secondary weapon locks so missiles can't be used. So to complete this mission, you must utilize primary weapons only, making the objective that much more challenging. However, enemy ships will also be restricted to primary weapons as well. Change your combat tactics accordingly for exclusive use of primary weapons, generally requiring closer ranges and a high energy bias setting for the weapon system. Powerful electrical discharges in the nebula cloud will also cause temporary damage to your ship's navigation system at random intervals. 
Mission 26: Escape From the Clouds With the success of destroying the rebel fleet, allied ships prepare to leave the nebula cloud to reach Sierra for a planned invasion. This mission requires you to destroy all Vonari spacecraft found at/near the waypoint. Allied reinforcements are scheduled to arrive a few minutes into the mission and you'll need to be ready to issue orders to them once in range. Watch the tactical console and/or radar for their arrival to properly time your orders. Return to the carrier when prompted.
Mission 27: Reaping and Sowing Once the fleet arrives in Sierra, it needs to replenish its supplies of certain materials. So this mission requires you to recover 25 units of platinum from nearby asteroids. Like previous resource recovery missions, once you have retrieved 25 units, you'll be prompted to return to the carrier with an updated waypoint.
Mission 28: Clash of Empires This mission is the first effort of the allied fleet to destroy the Vonari presence in Sierra. It involves attacking their forward fleet just beyond the location of their base in the system. This is a straightforward attack mission involving a high number of both enemy and allied ships. Two Vonari capital ships are also in the area and need to be destroyed. The Excalibur missile system is introduced in this mission, but may not be the best choice for this objective. It may take several attempts and different configurations/strategies to complete it successfully. 
Mission 29: Valuable Cargo This mission requires you to defend the Titan as it arrives at a hidden location inside a nebula cloud and later departs. It carries special cargo (new bomb technology) that will be used for the final mission in the campaign. Close formation with the Titan and careful orders are key to success in this escort objective. 
Mission 30: The Taller They Are This is the final mission in the campaign and requires destroying the Vonari base in Sierra with a timed fulcrum bomb. The time to detonate will be displayed on the lower right side of the Heads-Up-Display and the bomb will need to be placed on the base before the timer reaches 0. You will also need to move away from the explosion area in time to prevent your ship from being damaged/destroyed. Be careful not to perform fast turns as the bomb risks exploding if it is exposed to such forces. A bar graph meter will be displayed below the time indicator showing how close the bomb is to exploding if it is exposed to g-forces that exceed its tolerances. The bars on the graph will change color to yellow when moderate exposure occurs and red when severe exposure occurs. If you center your ship's control, the indicator will gradually return to a safe indicated level. You must place the device at a nearly point blank distance from the base. Once you are close enough, press the secondary weapon key/button to place the device. Once the timer reaches 0, the device will detonate and destroy the base. |