OFFICIAL STRATEGY GUIDE


|
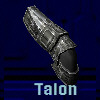
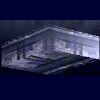
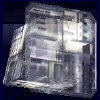
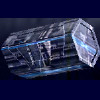
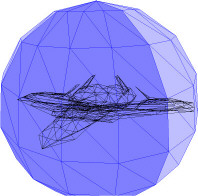
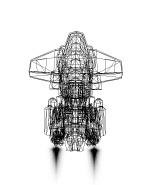
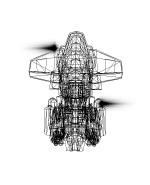
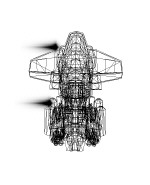
The Talon is a scout class frame that provides a basic platform for new mercenaries. It is inexpensive to build and operate. While the weapon options and defensive capabilities are limited, the Talon frame is the fastest platform and most maneuverable. While its design possibilities are limited, it can be optimized effectively for particular advantages. |
|
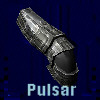
The Pulsar frame expands on the original and provides more assembly resources with a minimal reduction in performance and maneuverability. It also includes substantially more armor and is a more flexible platform from a design options standpoint. |

|
The Saber is a fighter class frame, although it is also used as a scout by many mercenaries. Its reinforced armor and efficient power system provide a high level of protection for such a small frame. Like the Raven, the Saber frame is considered to be the best choice for light and medium combat duties by most mercenaries and is very affordable. |
|
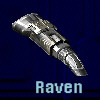
The Raven frame expands on the Saber design. With a larger size, it offers more assembly resources and armor at a similar level of performance. Named after the Alliance combat spacecraft that fought in the first Alliance-Federation war, the new Raven provides a solid platform for mercenaries looking for a capable combat frame with amazing performance and maneuverability. |
|
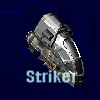
The Striker frame is a unique compact design that uses blended metallic composites for very effective armor protection and advanced technology to keep its overall size small compared to other frames. Its rounded shape and powerful energy system allow it to have a high level of assembly resources and support for energy hungry shield systems. An excellent multi-role frame. |

|
The Phoenix class frame is a revised version of the Striker, offering a much larger structure with more assembly resources and armor. These improvements are available with a minimal reduction in agility. Most mercenaries who prefer the advantages of the Striker frame choose the Phoenix as the best version. |
|
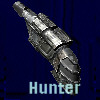
Designed to survive intense large scale battles and protect valuable cargo from even the most powerful adversaries, the Hunter class frame boasts triple layer metallic composite armor and plenty of assembly resources for high end components. It's main drawback is limited agility and speed, but it is ideal for mercenaries who require high end offensive and defensive capabilities. |
|
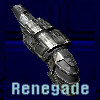
The Renegade class frame was built as a combat oriented upgrade to the Hunter frame. It sacrifices some agility for a larger size with 25 more assembly resource points and another layer of armor. It also features a compression capacitor in its engine management module, which helps to minimize the loss of speed, resulting in a reduction of only 50 MPS base speed compared to the Hunter frame. |

|
Considered the battleship among mercenaries, the Centurion frame commands attention and respect. Only wealthy mercenaries can afford to buy and operate this ship, but the reward is a commanding lead over other frames in most combat situations. It can be designed to also be an effective transport, offering a level of cargo safety far above what other ships are capable of. |
|
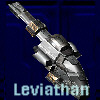
Several private mercenary groups pooled their resources together to develop the Leviathan class frame as an answer to the Centurion which had dominated much of Evochron for a long time. The Leviathan offers an unequalled level of assembly resources and armor. It usually takes a skilled group of pilots to defeat one of these ships. |
|
Food can be scarce in Evochron. While it is usually very low in value, some systems do pay substantially more. |
|
|
Medical supplies are an essential part of survival in Evochron. High radiation exposure and virtually non-existent preventative health care result in a higher than normal demand for medical supplies, which can include medicine, equipment, and information. |
|
|
Hydrogen fuel cells are a common medium level energy source that some systems use for general purpose electrical power needs. Their moderate value makes them a popular shipping choice. |
|
|
Electronics are in demand, but are also high in supply. They generally aren't a valuable commodity, but shipping supplies of electronics can be an easy way to make money for new mercenaries. |
|
|
Solar cells are a low end energy source. Don't expect much for these primitive devices, but in the right system, that can be worth the cargo space. |
|
|
Metal alloys are a low value commodity the provides the raw material needed for manufacturing. Delivering this item doesn't usually provide much profit unless there is a temporary demand for it. |
|
|
Diamonds are a high value commodity used in a variety of applications ranging from cutting tools to optical equipment. They are almost always in demand and are a primary incentive for mining. |
|
|
Anti-matter cells are a high end energy source that are extremely expensive to produce and provide a very long lifespan. As a result, a premium is paid for these devices to anyone who can deliver them. |
|
|
Fusion cells are also a high end energy source, but are much easier to produce. They feature a very long lifespan and usually provide a high price for shipping. |
|
|
Machinery parts generally consist of cast or forged components in fairly high demand (brackets, sprockets, springs, etc). They usually provide a fairly high profit, much higher than raw metal alloys alone. |
|
|
Textiles are generally the cheapest items to transport and are generally best left out of a cargo bay unless you've got the extra space. |
|
|
Platinum is generally the most valuable commodity in Evochron. It is used for electronics, primarily in the computer and weapon systems of spacecraft, due to its longevity and conductive properties. Many mercenaries will jettison their existing cargo to recover platinum. |
|
A fuel converter is a remarkable piece of equipment that can transform high energy photon particles into fuel. It connects to the tractor beam system and fuel tank to directly deposit the converted fuel into the tank. |

|
A class 1 Fulcrum jump drive is the entry level model. It is capable of jumps up to about one sector box away. |
|
|
The class 2 Fulcrum jump drive is capable of jumps up to about two sector boxes away. |
|
|
The class 3 Fulcrum jump drive is capable of jumps up to about three sector boxes away. |
|
|
The class 4 Fulcrum jump drive is capable of jumps up to about four sector boxes away. |
|
|
The class 5 Fulcrum jump drive is capable of jumps up to about five sector boxes away. |
|
|
Rumors suggest there is an experimental model of jump drive that uses a completely different technology for distances of well over five sector boxes. |
|
A class 1 cargo scanner is capable of detecting the identity of cargo (either in open space or in a ship's cargo bay) at a range of about 500. |
|
|
A class 2 cargo scanner is capable of detecting the identity of cargo (either in open space or in a ship's cargo bay) at a range of about 1000. |
|
|
A class 3 cargo scanner is capable of detecting the identity of cargo (either in open space or in a ship's cargo bay) at a range of about 1500. |
|
|
A class 4 cargo scanner is capable of detecting the identity of cargo (either in open space or in a ship's cargo bay) at a range of about 2000. |
|
|
A class 5 cargo scanner is capable of detecting the identity of cargo (either in open space or in a ship's cargo bay) at a range of about 2500. |

|
The cannon relay system doubles the energy capacity of your primary weapon system and adds two additional gun barrels to an installed particle cannon. It works by storing extra power in a network of capacitors, supplying sufficient energy for two firing cycles of the primary weapons. |

|
The mining and tractor beam is one of the most important devices in the game. It lets you mine for valuable material, recover cargo from destroyed ships, retrieve photon particles from stars and nebulae, and recover items from cargo containers. |
|
Shield boosters are the power storage part of the shield system. They are a series of capacitors that store energy for each shield array. A single cell provides basic storage capacity for the shield system. |
|
|
Two shield booster cells provide roughly double the storage capacity. However, impact damage won't be half as much due to the varying energy delivery rates of different shield cores (the component that has the greatest effect on shield performance). |
|
|
Three shield booster cells provide roughly triple the storage capacity. |
|
|
Four shield booster cells provide roughly four times the storage capacity. |
|
|
Five shield booster cells provide roughly five times the storage capacity. |

|
Repair devices automatically repair subsystem and hull damage in-flight. Installing one of these means you don't have to dock and pay for repairs. Subsystem damage can be repaired fairly quickly, but hull damage takes a long time to repair. A class 1 device provides basic repair capabilities. |
|
|
A class 2 device can repair damage roughly twice as fast. |
|
|
A class 3 device can repair damage roughly three times as fast. |
| Cannon Name | Yield | Cycle Rate |
| FlareBeam | 10 | 120 |
| IceSpear | 25 | 120 |
| FireFury | 35 | 120 |
| StarGuard | 45 | 120 |
| Stalker | 70 | 100 |
| Eclipse | 80 | 100 |
| StarForge | 100 | 100 |
| Maxim-R | 120 | 100 |
| SunRail | 130 | 90 |
| Razor | 140 | 90 |
| Predator | 150 | 90 |
| Trebuchet | 180 | 90 |
| Atlas | 200 | 90 |
| Phantom | 220 | 90 |
| Banshee | 250 | 90 |
| Beam Name | Yield |
| Refractor Laser | 10 |
| Metal Vapor Laser | 25 |
| Coil Laser | 40 |
| Neodymium Laser | 55 |
| Fusion Laser | 75 |
| Missile Name | Yield | Speed | Estimated Range |
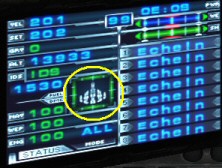
| Echelon | 1000 | 1400 | 3800 |
| Viper | 1200 | 1200 | 3500 |
| Rockeye | 1400 | 1000 | 3400 |
| Starfire | 1800 | 900 | 3000 |
| Exodus | 2500 | 700 | 2400 |
| Leech EMP | 200 | 1000 | 3500 |
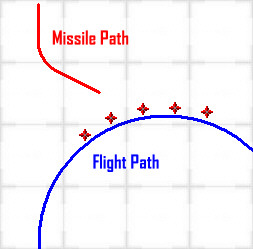
| Excalibur | 800 (X8) | 1800 | 4000 |
| Fulcrum Torpedo | 110,000 (at center) | 250 | 2000 (auto detonate) |
| Stealth/Cloaking Device | Time per device: 60 seconds |

|
Economy Type: Agricultural - Food values are generally 50-75% lower. Economy Type: Industrial - Metal values are generally 500-950% higher. - Machinery components are generally 50-75% lower. Economy Type: Technology - Electronics values are generally 50-75% lower. - Diamond values are generally 150-250% higher. - Platinum values are generally 350-550% higher. Economy Type: Bio Research - Medical Supplies values are generally 50-75% lower. Economy Type: Energy - Hydrogen Cell values are generally 50-75% lower. - Solar Cell values are generally 50-75% lower. - Antimatter Cell values are generally 50-75% lower. - Fusion Cell values are generally 50-75% lower. |
|
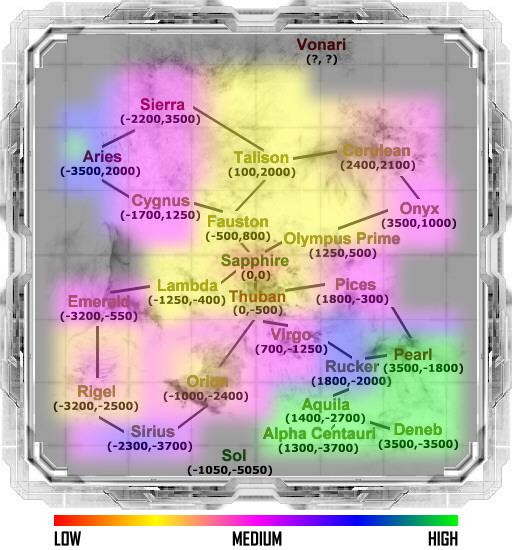
Beacon 1 Sector X = 0 Sector Y = 0 Sector Z = 0 Position X = -25500 Position Y = 5000 Position Z = 12750 |
Beacon 2 Sector X = 2 Sector Y = 0 Sector Z = 3 Position X = 57000 Position Y = -5000 Position Z = 85000 |
Beacon 3 Sector X = -500 Sector Y = 0 Sector Z = 802 Position X = -51000 Position Y = -2500 Position Z = 24000 |
|
Beacon 4 Sector X = 3500 Sector Y = 0 Sector Z = 1000 Position X = -51000 Position Y = -2500 Position Z = 24000 |
Beacon 5 Sector X = 1800 Sector Y = 0 Sector Z = -299 Position X = 78000 Position Y = 0 Position Z = 78000 |
Beacon 6 Sector X = 1800 Sector Y = 0 Sector Z = -2002 Position X = 10200 Position Y = 9250 Position Z = 10050 |
|
Beacon 7 Sector X = 1820 Sector Y = 0 Sector Z = -1980 Position X = 55000 Position Y = 9000 Position Z = 55000 |
Beacon 8 Sector X = -2300 Sector Y = 0 Sector Z = -3700 Position X = 0 Position Y = -3000 Position Z = 0 |
Beacon 9 Sector X = -3200 Sector Y = 0 Sector Z = -550 Position X = -50000 Position Y = 5000 Position Z = -70000 |
|
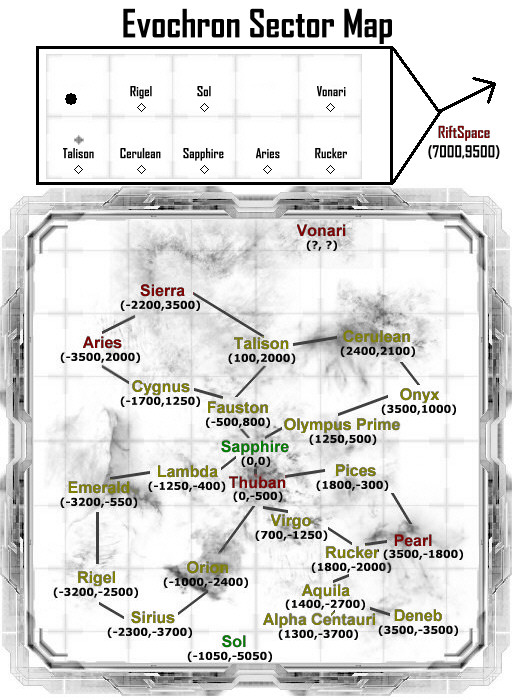
Aries Sector X = -3588 Sector Y = 0 Sector Z = 2028 |
Cerulean Sector X = 2488 Sector Y = 0 Sector Z = 2128 |
Virgo Sector X = 720 Sector Y = 0 Sector Z = -1245 |
Pearl Sector X = 3588 Sector Y = 0 Sector Z = -1808 |
Deneb Sector X = 3588 Sector Y = 0 Sector Z = -3488 |