OFFICIAL STRATEGY GUIDE

|
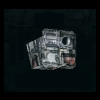
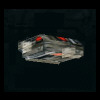
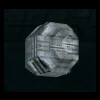
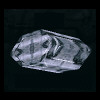
SPOILER ALERT: Many of the tips and secrets in this strategy guide will detract from the challenge of the game and give away a lot of hidden benefits. If you don't want to spoil the challenge of the game, you may not want to read some or most of this guide.  1. Introduction Welcome to the official Evochron Legends strategy guide. This guide will give you detailed information about the game along with tactics and tips to become a master pilot. Game secrets and hidden locations are also available in this guide. Many rookie pilots travel to Evochron in search of wealth, quickly venturing beyond the safety of the central Sapphire system, only to find they lack the skills and equipment necessary to survive in what can be an extremely hostile place. This strategy guide will provide many of the tactics and tips master pilots use to survive and advance in Evochron. While the information contained in this guide may give you an advantage, the single best way to improve your chances and abilities is to practice. This guide is also intended to be an expansion of the instructions that come with the game which cover many of the basics needed to get started. If you haven't read the instructions yet, it is recommended that you do so first before using this guide. Evochron's freedom and independence means you are responsible for your own success or failure. You must protect yourself and your own interests. In hostile space, you can be attacked at almost any time for any reason by almost any ship (even those that may have a temporary or long term alliance with a faction you're on good terms with). At the same time, you can build alliances to reduce your risk and/or buy ship components that allow you to pass through hostile space relatively safely. Building your ship is just as important as building your reputations. Make sure to design your spacecraft for the role you want to play, install components needed to keep you safe and to complete the objectives you want. Evochron is about survival and direct control. You won't be required to remote 'point-n-click' control anything or bark orders to computers to play the game for you, you are in direct control of your ship and its systems. You aren't a sideline spectator watching events unfold, you are part of the Evochron universe. Your survival depends on your skills as a navigator, trader, combat pilot, explorer, and systems operator.  1.1. Getting Started When you start the game, you will be placed next to the first beacon of the story quest involving Scott Gerret and his search for his brother who was a pilot onboard a battle carrier during the Arvoch Conflict. The first beacon will display its message immediately, but each additional beacon in the quest will require you have a certain ship configuration or item in your cargo bay before the message will be displayed. The beacon quest is not required, you can follow the beacons or venture off to do other things at any time. You may want to mark the location of the first beacon on your nav map to save it for later reference in case you want to complete the quest later.  Locate and Acquire a Mining/Tractor Beam The first objective you may want to complete is finding a mining/tractor beam. This is one of the most important equipment items in the game as it lets you recover cargo and mine for valuable materials (found in asteroids and planets). One of the most profitable activities early in the game is mining asteroids and this device is needed to harvest the ore. Asteroids generally carry valuable material that is easy to get to since they are in open space, but to find the mining/tractor beam, you may want to land at a city on the surface of Sapphire where they are often available in the local inventories. Once you find one, click on it in the 'Items for Sale' list to install it on your ship. Once installed, travel back into space and head for the local asteroid field.  Mining To get started mining, simply fly close to an asteroid and activate the mining beam. You can lock the beam on by pressing the default Alt-B key combination. If you are close enough to the asteroid to mine it, you will see hot red particles of the asteroid fly off from its surface as the beam cuts into the rock. If you do not see this effect, you're not close enough to the asteroid. In Sapphire, metal ore is generally not very valuable, so you can discard any metal you recover in favor of platinum or diamonds, which are far more valuable. To discard an item, simply click on its listing in your cargo bay. Once a cargo bay slot is empty, it can accept any material. But once one unit of a material is placed in a cargo bay slot, you can only continue to load units of that material type into that cargo bay slot. The reason for this is so you can manually manage what material you mine and it accommodates the different shapes and sizes of each material type. Each unit of a material is assigned a unique shape for every container that holds it. These shapes are only compatible with each other and must 'fit' together inside each of your cargo bay slots. Your mining and loading system will automatically take care of this sorting procedure for you, all you need to do is select which materials you want to keep or discard. You can pre-prime your cargo bays by buying or leaving only 1 unit of an item in each cargo bay, then travel to an asteroid field to mine. This lets you recover only the material you want while mining. To buy or sell individual units of items at a time, use right click instead of left click. Once you have filled your cargo bay with the material(s) you want, travel to the nearby planet Rivoch to sell what you have for better profit. You can also mine the surface of planets for other valuable materials. Mining this way is a safe way to make decent credits early in the game. You can also earn a few credits while you descend into a planet atmosphere. Keep your tractor beam on as you descend into a planet atmosphere to recover oxygen. This can be sold for as much as 30-50K once you arrive at a city by the time you land, easily covering the costs of fuel for the descent and also leaving you with plenty of credits left over.  Racing While you are still in Sapphire early in the game, consider also completing some contracts. Racing can be a great way to earn some quick credits while also practicing with the controls of your ship. You'll learn how to balance speed and agility with zero gravity drifing and the maneuvering thruster system your ship uses. You may not win too many races at first, but the races only cost you fuel and you'll likely soon start to develop tactics on when to speed up or slow down and when/how to perform turns while staying inside the race course boxes. Your ship's shield system will default to a 'passive' mode while you are racing, allowing you to bump against the other ship(s) during the race without bouncing off and losing momentum. You may also want to race other players online for more challenging practice as you become better at winning races.  Cleaning Solar Arrays Another way to safely earn credits early in the game is to clean solar arrays. Local companies often have solar arrays in a temporary location that need to be cleaned and they will pay well for a pilot to take care of the cleaning for them. These arrays get covered in a film of debris during open space manufacturing and during transport. The mining/tractor beam can be used to safely remove the debris from each panel, but it must be done carefully so you don't miss completely cleaning one or more arrays. Missing an array can add long delays to the process by forcing you to go back over the panels to scan for the one you missed. So take your time and carefully clean each array fully before moving on to the next one.  Locating and Returning Items Early in the game, few options can earn you credits as quickly as locating and returning items. For location contracts, all you have to do is locate a lost item and fly close enough to scan it. The waypoint will give you the general location, often close enough to pick up the item on your 3D radar (purple blip). Once you've located the item and fly close enough to it, you'll be paid immediately. To return an item, you'll need to have room in your cargo bay and need to fly close enough to the item so your mining/tractor beam can pick it up. Once it's placed in your cargo bay, return to the local trade station to deliver the item and get paid.  Cargo Delivery Another good paying option early in the game are cargo delivery contracts. Simply deliver an item they give you to a waiting transport. The waiting transport is generally right at the waypoint location, which your jump point marker will be highlighting once you arrive unless you change it. The waiting transport will be a very large ship and you'll need to fly close to it before delivering the cargo. Fly to within about 750 meters of the ships, usually under it or next to it is best, then press the default J key to jettison the cargo so the transport can tractor it aboard. Be careful not to discard the cargo, otherwise you'll destroy it rather than deliverying it to the transport. Also, make sure you do not have other items in your cargo bay, otherwise you will be giving the transport free items that they will be happy to take from you without reimbursing you for them. Sell or trade other items in your cargo bay before accepting delivery contracts to avoid giving away items that can provide you with credits. 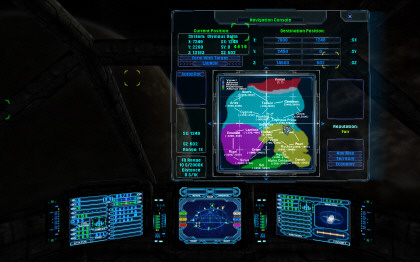 1.2. Location and Early Combat Sapphire is a safe place to remain early in the game. But once you've upgrade your ship a few times, you may be ready to venture out in to other nearby systems. The first system you may want to travel to outside of Sapphire is Olympus. Olympus is a mostly friendly system with the limited number of hostiles being equipped with low level weapons and ships. So while there are some hostiles in the system, they are limited in their number and capabilities. A good docking point is the trade station near the planet Olympus Prime. This is a good location to start on some basic combat contracts that will help you build your skills. If hostiles are nearby while you are trying to travel to a station or other location, you can turn off the IDS and use the afterburner to accelerate to speeds above around 3000 MPS. At that speed, enemy gunfire and missiles won't usually hit you unless they are approaching you from ahead of the direction you are flying in. Flying this way will generally keep you safe until you arrive at your destination and need to slow down. When flying in combat, try to minimize using missiles as they are expensive and can deplete the profit you make from the contract. Use guns as much as possible. Practice evading incoming gunfire and missiles while you also learn how to achieve good attack positions on a target. As you learn combat and completing combat contracts in Olympus becomes easier, you'll likely be ready to move into more challenging systems throughout the game's universe. Generally speaking, the farther away you get from Sapphire, the more challenging you will find opponents to be. If you travel to an area that is too difficult for you, you can return to the previous system or search for another 'Fair' rated system nearby that isn't as challenging. 'Fair' rated systems are ideal for rookie players as they generally provide a wide variety of contract options in a low risk system with fewer hostiles. Remember to save often (default Alt-Q for quick save) when you are at safe locations to keep your progress. It's also a good idea to save in different profile slots in case you accidently save at a location you don't want. 2. General Information Evochron is an amazing place. It is the largest system in charted space with a diverse collection of systems and people. It is the site of the last Alliance-Federation War and has been home to everyone from adventurous colonists to retired and active duty fighter pilots. Once controlled and protected by the Alliance, Evochron is now a largely independent region of space with ambitious treasure hunters travelling between its systems in search of opportunities to obtain their fortunes. The abundance of its resources provides an almost endless supply of materials for trade and commerce. The section below provides general information about the game including ship frames, commodities, weapons, equipment, locations, ship systems, navigation, and quest details. This can be a useful quick reference, but may spoil some of the challenge/enjoyment of the game if you are interested in discovering such details on your own while playing. SHIP FRAMES (MILITARY) COMMODITIES EQUIPMENT/UPGRADES PARTICLE CANNONS BEAM CANNONS MISSILES/SECONDARY DEVICES Ship Frames (Civilian)
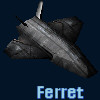
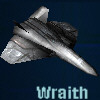
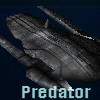
Ship Frames (Military)
Commodities
Equipment/Upgrades
Particle Cannons
Beam Cannons
Missiles
Secondary Devices
The 'fair' wage value they expect to be paid is based on several criteria including their skill, loyalty, and your wealth. Each crew member's trade also impacts how much they expect to the paid. Here is the calculation used to establish the base fair wage for each trade:
Pay your crew well and their loyalty will increase, pay them poorly and their loyalty will decrease. Once a crew member reaches 100% loyalty, you'll just need to maintain their pay at the fair wage and perform well with contracts to keep their loyalty. Crew members with low loyalty have a higher chance of leaving your ship next time you dock. Below is a chart showing how much a crew member's loyalty can increase or decrease based on how much you pay them relative to the fair wage they expect and also whether you complete or fail contracts.
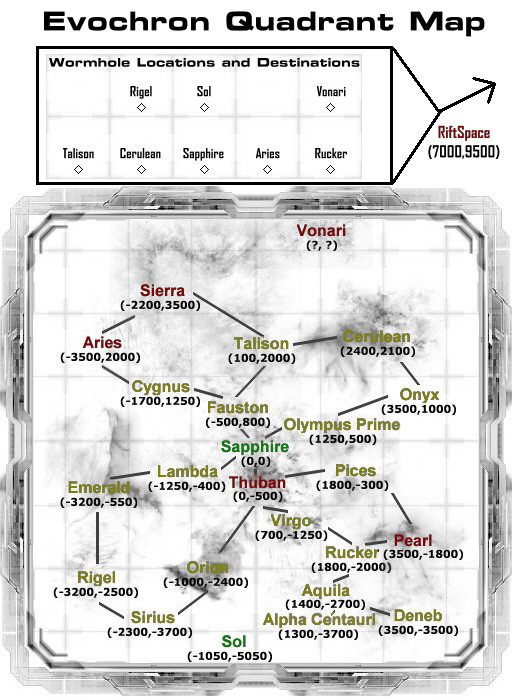
This is the main trading center in Evochron and is firmly in Alliance control. It has jump gates to all 4 sections of the Evochron system. Sapphire is considered the launching point for new mercenaries due to its strong Alliance presence resulting in a well protected system with a positive reputation level. Very few major conflicts ever occur in this system, mostly minor fighting between individual mercenary ships. Because of a saturated market, commodity values and contract pay is generally very low, but the safety of the system makes it a good starting point for new mercenaries. This is the last solar system to remain under Alliance control since the war. Lambda Lambda is a lightly populated system, but was once the home of the Federation Military Command Center. Most of the system's population departed in the late 24th century due to increasing living costs, high Federation taxes and the resulting decrease of opportunities for freelance mercenaries. By the turn of the century, most Federation companies departed the system and Lambda now primarily consists of just a few scattered independent colonies. While not a particularly hostile system, the quest for survival does lead to several small scale conflicts. A good buy can sometimes be found here, but Lambda is not considered a good place to make a profit. Emerald Emerald is arguably one of the most beautiful systems in Evochron. A bright green planet orbits a warm yellow star with a soft blue-green nebula backdrop. It's a peaceful setting for a system with a moderate level of conflict. Emerald has a relatively strong economy with good opportunities for independent ship owners, but reports continue to come in about attacks from rogue groups ambushing traders in the area. Emerald is also subject to high Federation taxes for local residents, which frequently drives away trade to nearby systems and has created a somewhat low end market for such a distant system. Emerald was one of the staging areas for the Alliance during the last war and played a critical role in providing the Alliance with the resources it needed to hold back advancing Federation forces from reaching systems closer to Sol. As a result, some older military weaponry and technology sometimes makes its way into the market here. Rumors continue to spread about this system being one of the last reported locations of Renegade activity. Rigel The Rigel system is the primary trading center between Sirius and Emerald. While not technically in the Evochron system (being just outside the lower Federation border), it remains free of Federation regulation, so many mercenaries from Emerald enjoy travelling to Rigel for tax free trade with local companies and other mercenaries from Sirius. Rigel is fiercely independent and does not identify itself as an Alliance territory or a Federation territory, so stations and planets here often charges docking fees and other fines to any outside mercenary regardless of where they came from. Most mercenaries agree that the minor cost in fees is easily offset by the higher market values found here. Sirius Sirius is a distant system with a good economy similar to Rigel's. A few key difference between Sirius and Rigel are the low cost of operations (typically no docking fees) and high paying contracts with relatively easy objectives. The gate system between Sirius and Sol was destroyed in the last war and has not yet been rebuilt, cutting off the main supply line to this system. So supplies are somewhat scarce resulting in fairly high prices paid for needed commodities and equipment. The planet Sirius B is generally considered a very good trade location for selling. Orion Orion was one of the earliest Federation controlled systems, dating back as far as the early 23rd century. It has several well established colonies and companies that support is local economy. Orion is largely self-sufficient with most local mercenaries working for one of the companies, so there isn't much demand for outside assistance in trade. On the positive side, this means low prices for available items and ship construction is similarly affordable. This makes Orion a good location for buying and it's a fairly safe system for new mercenaries who may not be ready for more hostile systems with more advanced technology. Thuban Thuban is the home of the Federation and although the war has ended, tensions remain high between the Alliance controlled system of Sapphire and Thuban. Local mercenaries here are known to attack ships from the Alliance without provocation. As a result, Alliance command continues to warn against travelling to the system. The system is usually in conflict with various companies and military factions battling for control of the system's abundant resources. For well equipped mercenaries interested in combat roles, this system offers some of the most attack, patrol, and spy contracts. Pices Pices is a neutral system that is often used as a trade center between Thuban and Pearl. Mercenaries looking for a central meeting point without the risks of attack common to both Thuban and Pearl often use Pices as the location to meet in. The economy is low here, but there are no docking fees for most mercenaries and expenses are equally low, including some of the lowest prices for for fuel in the lower region of Evochron. Pearl Pearl is a large system consisting of several planets and is the site of the Arvoch Conflict that took place a few years ago. Abundant resources and numerous opportunities make Pearl a system with some of the wealthiest and best equipped mercenaries in all of Evochron. Even though resources are readily available, shipping them in this system is extremely risky, so premium prices are paid for even the most basic supplies and equipment. Survival here depends on skill, wealth, and a powerful ship. Rumors suggest there is a remote research facility in this system on a distant world providing advanced and experimental technology. Rucker Rucker is named for the admiral of the Alliance fleet in the first Alliance-Federation war. It is a large system filled with asteroids, making jump drive navigation dangerous. While not a common stop for mercenaries due to the difficult navigation conditions, it does offer a moderate economy with no docking fees and low prices. It is considered a potential gold mine for mercenaries interested in mining due to its vast asteroid fields and its close proximity to the high paying system of Pearl. Virgo Virgo is a lightly populated system of mostly colonists. While the system is technically in Federation controlled space, it was given independence in 2374 and has been almost entirely self-sufficient since that time. Its inhabitants pride themselves in their abilities to live off their own resources and typically discourage outside trade. As a result, they offer very little for most items and commodities. How this system has remained to survive for so long without outside assistance and do so well has been a long term mystery. Rumors suggest they control a hidden world somewhere nearby that supplies resources they would otherwise not have access to. Aquila Aquila consists of one planet in orbit around a blue-white star. While it may seem like an empty system, it does provide a high paying trade location with several stations. It is the central trade location between Alpha Centauri, Deneb, and Rucker. Alpha Centauri Alpha Centauri has the distinction of being the first system to be colonized outside of Sol. The open trade between this system and Aquila results in it having a virtually identical economy, although the planet AC528 is known for paying slightly more for most items. There are also no docking fees for most mercenaries in this system, giving it a cost advantage over both Aquila and Deneb. Deneb Deneb is a remote system with only one gate exchange with Alpha Centauri. Resources are scarce, so premium prices are paid for commodities, but the system has very advanced technology. Deneb has admitted to having an advanced weapon research facility, but refuses to reveal the location. They've likely constructed it well outside the range of most navigation sensors and long range scanners. Sol Sol is the home system of the Alliance. It does not have any current jump gates to or from its location, so it generally sees very few visitors from Evochron. Fauston Fauston borders on being a hostile system, but most ships generally leave each other alone. It's low economy makes it an unpopular trade stop for selling, but a common one for buying and refueling. Many new mercenaries visit this system first once they leave Sapphire and try some of their first combat contracts here. The level of technology is very similar to Sapphire, so most ships have limited capabilities and don't pose much of a threat to rookie mercenaries with entry level ships. Cygnus Cygnus is the primary refueling location for traders travelling between Fauston and Aries. It's low prices for fuel and equipment make it one of the most popular stops for travelling mercenaries in the entire upper region of Evochron. Docking fees generally apply here, except for Federation citizens and their allies. Aries Aries is a hostile system where battles often rage for the few scarce resources available. Not much trading takes place here due to the system only having one planet with two stations, instead many mercenaries have resorted to fighting each other for the cargo they are carrying. Aries is considered to be one of the most dangerous systems in Evochron and generally best avoided. Why the system is home to so many mercenaries remains a mystery, it's quite possible there are resources available here that aren't in the charted part of the system. Sierra Sierra is another hostile system, although it is outside the Evochron system and Federation controlled territory. Very little organized trading takes place here, although some traders travel from Talison for the higher selling values. It is one of the most recent systems to be colonized and as a result, doesn't have an established government or economy. The two planets in this system are also down for their bad weather and Sierra A in particular has extremely windy conditions making atmosphere descents much more challenging. Talison Talison has a moderate economy and technology level without docking fees for most mercenaries. This is an active trading location with ships coming from Fauston and Cerulean on a regular basis. Although the government of Talison considers itself independent, they were part of the Federation until just recently. Now without Federation supply deliveries, Talison offers good prices for most items and equipment. This is a popular location for mercenaries heading to Cerulean and Onyx for high value sales. Cerulean Cerulean is known for its beautiful blue starscapes and planets. Trade between the two planets in this system is popular for quick credits with a short trip. Cerulean is currently under Alliance control and does not generally charge docking fees for mercenaries. Strong markets with high demand for commodities along with a relatively high technology level provide several unique qualities in this region of Evochron. Scattered encoded communications have suggested there may be a hidden planet somewhere in this system with advanced technology far beyond what is offered in the charted part of the system. Onyx As its name implies, Onyx is a dark system with a blank backdrop and cold rocky planets. A few wealthy mercenaries flying Centurions and Leviathans are said to visit this system from time to time, further supporting the rumors of a hidden planet with advanced technology in Cerulean. Olympus Prime Olympus Prime is often considered an extension of Sapphire. It is a large system that is used for repairing, reloading, and refueling by many mercenaries who are travel to the upper Evochron systems. While not a particularly wealthy or advanced system, it is a good second system for new mercenaries looking for a mostly safe system with low level threats and plenty of job opportunities. Vonari The Vonari system is home to the aggressive race that is responsible for several wars and continues to attack randomly. Mercenaries are advised to avoid this system entirely as the technology level of the Vonari is very advanced. The hidden Alliance outpost is still being operated, although a cloaking field protects it from detection. It has been a stop for a few brave mercenaries who have traveled to this system in their efforts to explore the area and test Vonari capabilities. RiftSpace RiftSpace is the home of the Renegades and includes several manmade wormholes to various systems in Evochron. In addition to the overall reputation level, you also have individual reputation levels with specific factions in each system that are divided into 5 categories, energy companies, militaries, rebels, guilds, and miners. Each of those reputations effects the contracts offered to you, your overall system reputation level, individual ship reputations, and economic/market conditions. You can change your reputation by selecting and completing contracts for particular groups and/or attacking ships that are hostile to them. Contracts are faction specific, meaning objectives will be offered based on your reputation and will involve objectives related to the interests of the faction offering it. Essentially, this will mean completing contracts for energy companies and militaries can lower your reputation with rebels (aka pirates) and guilds (aka clans) while completing contracts for rebels and guilds can lower your reputation with energy companies and militaries. Your overall system reputation will likely increase by staying on the legal side and completing contracts with company/military factions who are generally part of the system's economy and government. Completing contracts with rebels and guilds who often work against the other groups will likely decrease your reputation. There are advantages and disadvantages to aligning with one group or the other. Your reputation with each faction in a system will be displayed in the news console along with the other stats. A series of bar graphs is presented, including color coding, to help make the various levels easier to read. Individual ship affiliations are displayed on the target detail MFD next to the ID indicator. The game will report to you when there is a change in your overall reputation in a system, which is a good time to save your progress as it can take a lot of effort to make major changes to your overall reputation. Long term loyalty to a faction can provide overall reputation benefits, while short term contract completing can result in losing progress you've made in building your reputation. If you leave before you achieve an overall reputation shift, then you've pretty much abandoned the reputation you were working toward and your reputation can fall a bit. Not always, but it can return to more average values because the faction's interest in you will quickly diminish if you stop working for them and they'll be on to hiring the next, possibly more loyal, long-term mercenary to work for them. If you want to use contracts as a way to shift your reputation, be consistent, work for them long enough to make it worth their time and investment to know they can count on you, otherwise, you'll just appear like a system hopper who only works a few jobs, then moves on, which won't help your reputation much. Loyalty and consistency is rewarded with the game's reputation system. Below is a chart showing the global levels with the transition overlap and how the faction values are reset as you transition from one level to the next in either direction. Follow the arrows for the reputation changes and the resulting default values.  Below is a chart showing various actions and the potential result you can expect for your local faction reputations in a given system. Changes to your faction specific reputations can vary, you may earn more reputation credit for a certain action at a certain time and generally speaking, bribing can result in more reputation credit than other actions. But you can review the effects of those actions and the directions your reputations can change using the chart below (+ for increase, - for decrease, = for no change).
Below is a chart showing how each wing/thruster system effects the performance of each ship frame. The blue bar indicates the agility factor for each wing/thruster system (how fast a ship can turn/rotate relative to others). The green bar indicates how much of an improvement each wing/thruster system provides to that frame (starting at 1.0). 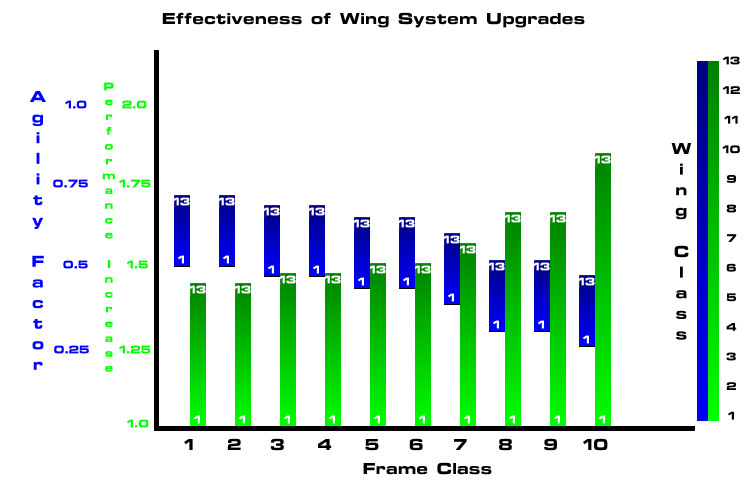
 Shield Systems - Arrays, Cores and Boosters  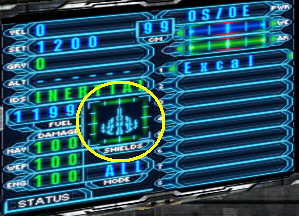  Flight and Navigation In space, there is no atmosphere to provide lift, friction, and drag. An object can simply drift indefinitely once speed is imparted to it. If a ship is travelling forward and turns right 90 degrees, it will still drift in the original direction it was headed due to inertia. If its original forward velocity was 1000 MPS, it will be drifting to the left at about 1000 MPS when it turns right 90 degrees and its forward velocity will drop to 0. Here is an image to illustrate this concept: 
The effects of managing a ship in space can be quite challenging, so the ships in Evochron have computer flight assistance to accommodate this zero atmosphere environment and provide a manageable control system for the pilot. Your ship is controlled by 2 main engine outlets and 8 maneuvering thrusters mounted on the hull. All of them are managed by your onboard computer when the IDS (Inertial Dampening System) is active. The computer will automatically activate each thruster as needed and modulate the control to keep the ship moving in the direction it is facing. Sharper turns at higher speeds will require longer adjustments before the ship's course is adjusted for the new heading. The engine outlets provide main thrust for moving forward and in reverse while the maneuvering thrusters provide rotational and strafe control. The engines offer two modes of power, cruise (also referred to as 'military burn') and afterburner. At cruise, the engines will provide a similar level of thrust as the maneuvering thrusters and offer the most fuel efficient maneuvering mode. At afterburner, the engines will burn a lot of fuel in exchange for rapid acceleration and deceleration. The performance of the maneuvering thrusters is determined by the wing and thruster set you select (see the bar graph above for specific performance information). Here are some images to illustrate a few of the ways the thruster system maneuvers the ship: 
When the IDS is off, you can manually control each thruster. This can be helpful in combat when you want to drift/slide while firing at a target. High speed drifting can make you a hard target to hit. Evochron Legends lets you control all maneuvering thrusters variably, if the control device you are using supports enough axis channels to take advantage of that option. When performing maneuvers, you will need to plan your course objective in advance, to avoid sliding into objects in space or reducing your speed to low levels that could potentially make you more vulnerable.  Navigation in Space The largest division of space used in the game is a quadrant. A quadrant is a massive cube of space that uses a coordinate system which divides it into smaller cubes. The smaller cubes inside the quadrant cube are called sectors and use the coordinate system to identify their location within the main quadrant cube. The center of the quadrant is sector 0,0,0, in the game this is displayed as SX, SY, and SZ values. So the center of the Evochron quadrant is 0 SX, 0 SY, 0 SZ where the Sapphire system is located. The image above shows the navigation console, which displays sector data from an overhead view. Click on Zoom Out (or scroll the mouse wheel down) to see more sectors on the map. From that overhead perspective, the SX value represents sectors to the left or right. -1 SX would be one sector to the left of the 0 SX sector. 1 SX would be one sector to the right of the 0 SX sector. The SZ value represents sectors up or down, which are sectors ahead or behind. As you move the mouse pointer over the various sectors displayed, you'll see the sector's coordinates on the left side of the navigation console. Click on Rear View to flip the map from an overhead view to a view from behind. This lets you see the vertical SY sectors. SX still represents left and right sectors in the Rear View mode, but up and down are now SY sectors. While most objects and solar systems are fairly level with the galactic ecliptic, many are above or below it. So for some objects and solar systems, you may need to set the SY value slightly off from 0 to travel high or low enough to reach a target destination. Negative SY values are sectors below the galactic ecliptic, positive SY values are above it. Click on Top View to return to the overhead view. For sectors that are level with your SY position, you can right mouse click in a sector to zoom in on it. This lets you plot more precise waypoints, greatly increasing your accuracy for jumping from sector to sector. Zooming in on nearby sectors to plot accurate jump points is a good habit to get into for safer travel. Sectors themselves are divided further into specific coordinates. In-sector coordinates are displayed on the navigation console as X, Y, and Z values (without the S before them). Each sector consists of 200,000 coordinates and like the quadrant cube, 0,0,0 represents the center of a sector. So negative X coordinate values indicate left on the map, positive X values indicate right on the map. Negative Z values indicate down on the map (or behind the center position) while positive Z values indicate up on the map (or ahead of the center position). Again, you can click on Rear View to see the map from behind for the Y values (or vertical elevation). There are 100,000 coordinates in any given direction, with -100,000 representing the minimum position and 100,000 representing the maximum position. So an X value of -90,000 would be near the far left edge of a sector cube on the map. An X value of 90,000 would be near the far right of a sector on the map. Once you exceed the edge of one sector, you pass into the edge of another. For example, if you fly to the far right edge of sector 0,0,0 and exceed 100,000 on the X (in-sector) coordinate value, you will then be in sector 1,0,0 at -100,000 on the X value, or the far left of the new sector that was to the right of the one you came from. As you travel through sector 1,0,0 in the same direction, the X value will increase until you reach the center of the sector at 0,0,0, then the X value will continue to increase until it reaches 100,000 at which point you will again pass into the next sector over. Continue heading directly right on the X axis and you will eventually reach sector 2,0,0, then 3,0,0, and so on. This way, you can use both the sector coordinates and in-sector coordinates to travel to various points in space. To aid in navigation, the Heads-Up-Display includes a compass and pitch ladder. The compass indicates your heading and the pitch ladder indicates the direction of the nose of your ship. If the compass reads 0, you are facing directly forward on the Z/SZ axis, or up on the nav map, and if you move in that direction, the Z value will increase (the SZ value will eventually also increase as you pass through sectors). If the compass reads 90, you are facing directly right on the X/SX axis. When it reads 180, you are facing toward the rear on the Z/SZ axis, or down on the nav map. When it reads 270, you are facing left on the X/SX axis. When the pitch ladder reads 0, you are level with the galactic ecliptic and the Y/SY axis. When the ladder reads 90, you are facing directly up on the Y/SY axis. When the ladder reads -90, you are facing down on the Y/SY axis. This section provides other information not provided in the sections above.  Constructor stations can build components from raw materials. For items that are built in different classes, you generally need 5-9 units for a class 1 model, 10-14 units for a class 2 model, 15-19 units for a class 3 model, 20-24 units for a class 4 model, or 25 units for a class 5 model. Here is a list of raw materials and the available components that a constructor station can make with them:
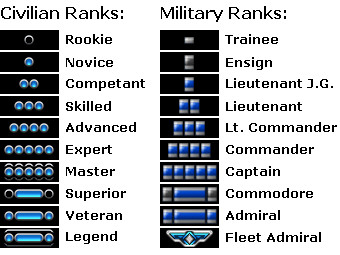 Your performance as a mercenary is tracked with two ranking systems. The first is your civilian skill and proficiency rank. This rank is a combination of your contract completion record/achievements, kills, wealth, and equipment acquired. When you earn a higher rank, you command a higher fee for your services, so you'll see your pay start to climb as your reputation for completing contracts improves. Failing or canceling contracts can prevent your rank from increasing. You generally receive about one point of rank credit for every 10 hostile ships you destroy, one for every contract you successfully complete, one for every 500K of credits you acquire, then further adjustments are made based on other wealth factors and the ship you are currently flying. Your rank level is then established from how many points you've earned and here is a chart showing each level:
The next is your military rank. This rank tracks your military combat record for missions completed in war zones. The more missions you complete for the Alliance, the higher your military rank will be. A higher military rank gives you access to more advanced military spacecraft. Below is a chart showing the number of missions needed for each rank:
 3. Advanced Combat Tactics Evochron Legends includes numerous combat controls and features that provide many options to attack or evade. So many in fact, that it might be a little overwhelming at first. So this separate section is offered to provide further details on more advanced combat tactics that can be useful once you have the basics down. Your combat skills are critical to your survival in Evochron Legends. Practice is the single best way to improve your chances and there are many tactics you can use for survival. For good practice, spend some time in Sapphire and pick fights with several friendly ships. Learn how hostile ships dogfight and develop some strategies to use against them. You will likely come up with your own style and unique combinations of offensive and defensive strategies. When you've finished practicing, exit the game and do NOT save (so you can keep your positive reputation in Sapphire). Below are some additional tactics and tips you can use. One of the main elements of the game's universe related to combat is the ship detection and AI system. Stations have powerful scanners that can pick up every ship in a 1 sector radius and they report their results to the various companies, militaries, and factions in the area. Contracts are then generated based on the interests of those groups and the status of ships in the area. It's the reason for how you can be offered contracts for known locations of hostile ships. They can track you down and issue contracts against you and your fleet in the same way you get contracts for ships in the area that are hostile to you. If one hostile ship is in range, they can report your location to other hostile ships in the area, resulting in others joining in to attack you. So plan your travel routes carefully and remain far away from nearby stations if you want to reduce encountering hostile ships. Travel quickly and use your jump drive frequently to avoid giving hostile ships more time to call in reinforcements and plan tactics/contracts against you. When you're ready to engage in combat, the tactics below can be very useful.      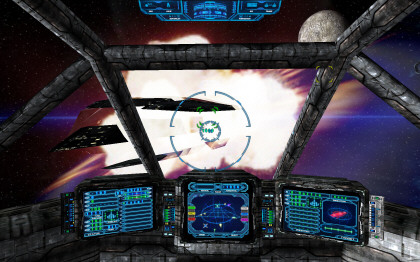  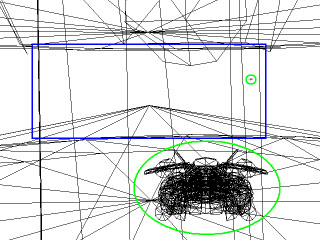 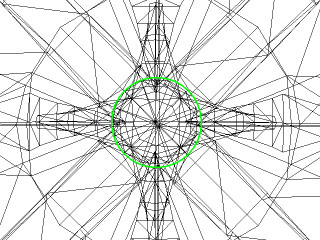 Use Stations for Defense Also, most hostile AI ships will simply wait outside of the docking area until you exit and return to open space. They know entering the docking area could be dangerous for them as it leaves little room to maneuver. So they will often fly around just outside the docking area waiting for you. Use this to your advantage by plotting a jump point before you exit the docking area. Buying a station license gives you additional protection by ordering hostile AI ships to depart the area while you are docked.  Effective Missile Evasion Most missiles rely on heat detection for their guidance systems. So a ship's heat signature plays a big role in missile tracking. If you're engines are active, a missile will have an easier time retaining its lock. To improve the effectiveness of your countermeasures and reduce the chance a missile will hit you, turn off the IDS, cut your engines, then launch countermeasures. The combination of no engine exhaust with countermeasures can mean very little chance of getting hit by an inbound missile. When your heat signature is eliminated, you can often evade a missile with just one or two countermeasures. Planets are a more challenging environment for this strategy. Your ship often creates a constant heat signature when you are flying in planet atmospheres because your ship has to use its engine's constantly to maintain flight. In emergency situations, you can turn off the IDS and cut your engines to reduce your heat signature, but you will freefall due to gravity, so make sure you have enough altitude and you may want to practice this kind of maneuver.  The first scenario is if a player fires an Excalibur at you head-on. When flying toward the missiles, use your primary cannon to shoot down as many as you can while simultaneously launching countermeasures. It's best to also cut your engines and turn off the IDS to reduce your heat signature, which will make it more difficult for these heat sensing weapons to keep their lock. Don't be too concerned about not destroying all of the missiles, a hit from a few of them won't generally do much damage. This tactic also lets you keep your focus on the incoming ship so you can counter-attack quickly at closer range. Next, if an Excalibur is fired at you from the side, maintain your course, turn off the IDS, then turn to face the incoming missiles. If your speed and distance from the missiles are high enough, increase your sideways velocity using the maneuvering thrusters only (which helps to keep your heat signature low by not activating your main engines). Launch countermeasures continually once the proximity alarm sounds and keep launching them until the missiles have been destroyed. The added sideways velocity will help keep you away from the missiles longer, giving the countermeasures more time to destroy the missiles. Pick off any missiles as needed with primary cannons if the countermeasures don't have enough time to be effective or if you run out of them. If an Excalibur is fired at you from behind at close range, engage the afterburner. Turn off the IDS once your velocity exceeds cruise speed to maximize your acceleration. The missiles will already have a solid lock on you and your escape velocity is more important than the heat signature in this scenario. The goal is to increase the time before impact so you can launch more countermeasures. Excalibur missiles are very fast, so it's not generally recommended that you turn around and try to shoot them down since that wastes time you can use to increase your escape velocity. By the time you turn around, the missiles can move in much closer, leaving you very little time to shoot them down. If you know your target will be using Excalibur missiles against you, try to never let your speed drop below 3000 MPS until they have exhausted one cycle of the weapon. Then move in as quickly as possible for a close range attack. Try to keep track of the next pending cycle of the weapon and if possible, keep your engagement at extremely close range to reduce the time they will have to obtain a missile lock. Keep them constantly turning and try to never let your movement slow enough for them to keep you in their gunsight long enough for the lock. It's even generally better to risk a collision to throw them off rather than allow your speed to drop long enough for them to get a lock. A collision can bounce you out of their gunsight and give you a chance to fire with your primary cannon, which also helps in preventing a missile lock. If you're at point blank range, evading an Excalibur becomes much more difficult. So avoid letting a player using the Excalibur to get in close, try to keep them at a distance of at least 500 meters or more until they've exhausted the weapon, then move in for a closer counter-attack. With some practice, you'll soon find that the Excalibur is not as intimidating of a weapon as it seems at first. Each missile does very little damage, it consumes all 8 hardpoints (so you know your opponent won't be able to fire anything else at you), it leaves the firing ship without any secondary weapons for 30 second intervals, and it risks causing damage to other allied ships they may not want to hit. Many players try to use it in multiplayer matches, but its effectiveness is limited against a skilled pilot. In fact, you can often find that an opponent is easier to engage when they are forced to fight with the limitations of this weapon.      If you are struggling with the agility of your ship and want a minor boost in agility, you can jettison your cargo bay to reduce the overall mass of your ship slightly and improve maneuverability.         4. Business Strategies and Tips Forming business strategies can be just as important as your skill in combat. To master the game, you'll need to explore for the best trade routes, learn effective negotiating techniques, build skills in mining and recovery of resources, save fuel, and reduce other expenses such as ship damage and fees. This section will give you some tactics to use to achieve these goals. While buying a station license does not eliminate or reduce the costs for renting a hangar, it can greatly lower your costs to access that hangar if you purchase one in a system that is 'Moderate' or 'Hostile' where docking fees will apply. Another expensive mistake is wasting resources. If you spend a lot in fuel to travel from one location to another for a trade, you can sometime lose much of the profit you think you are making. Some players make the mistake of travelling to a high paying system for a particular commodity, but they spend tens of units of fuel to get there, then buy fuel from that far more expensive market, costing them much of their profit. So plan your trade routes carefully and make sure to include travel costs in your profit calculations. You can pre-prime your cargo bays by buying or leaving only 1 unit of an item in each cargo bay, then travel to an asteroid field to mine. This lets you recover only the material you want while mining. To buy or sell individual units of items at a time, use right click instead of left click. ContractPrice = (((SystemEconomyLevel*1000)*PlayerReputation)+(PlayerRating*100))+(NumberOfHostiles*(5000.0*(1.0+(SystemEconomyLevel*0.1)))) From there, adjustments are made based on the contract type, value of cargo involved (if applicable), and other factors. Reductions are applied for simple contract types, including delivery, returning an item to a station, and locating a lost item. Reduction values for each of these contract types are 0.55, 0.7, and 0.5 respectively. Combat contracts are often the most valuable, especially in moderate and hostile systems where the number of enemies are usually higher for contracts. Additional pay is given for contracts that involve a capital ship, nearly double the base value credit for the number of hostile ships. However, the increased value for combat contracts simply help offset the higher cost of operations for using more fuel and weapons. So consider these expenses when determining which contracts to accept as non-combat contracts can actually be more profitable in a variety of situations. Economies are divided into 5 sub categories and a general category. A general economy planet has a market structure that typically includes many different types of commodities and pricing is largely based on the overall economic conditions of the system. An agricultural economy creates an abundance of food, so the prices are generally very low for that commodity. An industrial economy will often pay a premium for raw metal ore and provide low prices for machined components. A technology economy will usually pay very little for electronic equipment, since they create most of what they need themselves, but will pay high prices for materials needed to produce them, including diamonds and platinum. A bio-research economy can be a good place to buy meds at low prices, then sell in other economies for profit. An energy economy can be a good place to buy hydrogen cells, solar cells, anti-matter cells, and fusion cells at low prices. The type of economy for each planet will be displayed after its name on the nav map, G is for a general economy, A for agricultural, I for industrial, T for technology, B for bio-research, and E for energy. The type of economy also effects what kind of items will often be available. Items that are produced by a particular economy will generally be added to the inventory pool more often (about 1/3 of the time for stations and about 1/2 of the time for planets) and are often inexpensive. Buying low priced items from locations they are produced in, then transporting them to systems where they are in demand can be one of the most profitable ways to trade in the game. Pricing adjustments for various economy types are listed below. Also be sure to read the global economy level factor in the next paragraph as an additional consideration for overall price levels in a system.
In addition to specific item pricing, the global economy market level is also a factor in determining the overall values of items in a system. Both factors (economy type and level) should be taken into consideration when planning trade routes. Changing inventories and price fluctuations can also impact the profitability of trade routes, although usually to a more minor degree. Below is a map showing the overall market levels for the charted systems in Evochron. 
5. Secrets and Hidden Benefits The game includes many hidden benefits. Some are gameplay related, such as discovering how to sell fuel for profit, while others involve exploration and discovery for particular objects, such as locating beacons and containers. This section will cover some of the hidden benefits and the options you can use to discover them. Much of what is provided in this section can spoil the challenge of the game significantly, so if you want to learn the secrets of the game on your own, then you may want to avoid this section. Gameplay and Cargo This first section reveals some methods on locating hidden cargo containers and detecting/recovering valuable items that are normally not easily detectable. Cargo Container Tracking One of the most effective ways to advance early in the game is to locate hidden containers, which carry items stored by local factions for later retrieval and are continuously replenished. The most effective method to hunt for hidden containers in the game is to hire a science ops specialist. Once hired, a science ops crew member can report the heading and pitch of nearby containers. The more skilled they are, the more often they will be able to provide direction information. Once you know the heading and pitch, you can often fly directly to them. If you're far away, then precision may be more difficult and you may need to jump out of the sector, then back in at different location to plot multiple pathways and pinpoint where the containers are located. You can make the process easier by marking your arrival points on the nav map using the map log. You can then visually triangulate the location once you get three points, narrowing down the area you need to search. Scanning Without a Scanner You can determine if a yellow threat level ship is carrying something in its cargo bay without a scanner by sending a trade request. If the ship rejects your trade request, it is likely carrying something it doesn't want to consider selling to you. If you enjoy hunting AI ships for valuable cargo, this is a way to detect cargo in a ship without having to give up an equipment slot for a cargo scanner. Search the Caves Asteroid caves make great hiding places and you can find several hidden benefits in them. Whether it's a fuel generator, containers, or even an entire station hidden inside, caves are a great place to find free items. There is some risk involved, so you'll want to practice flying through the tight channels of asteroid caves. It takes some practice to recognize which channels are large enough to pass through and which ones risk crushing your ship. Andromeda As the beacon quest hints at, there is more to this system than may appear at first. This is one game secret that isn't given away in this guide and may be something that is revealed at a later date. But for some basic benefits it also offers, you can find a few containers with valuable goods and a unique location with a continually 'replenishable' supply of some of the most powerful and unique items available in the game. To return home, the artifact left there can be operated to transport you to any of the four sections of the Evochron quadrant.
Beacon Quest Walkthrough (Arvoch Conflict Artifact) Beacon 1 - 'Introduction' Located next to where you start the game. It provides a summary of events regarding the Gerrett brothers and the discovery of a device/artifact found during the Arvoch Conflict. It instructs the player to bring at least 15 units of electronics to the next beacon located near the Y coordinate level of -14100 on the planet Erato II. Beacon 2 - 'Symbols' Symbols are discovered on the device, apparently star charts. The player is instructed to travel to the rings of Fauston, away from the nearby star, and to be in a Saber class frame for the next beacon to activate. Beacon 3 - 'Surprise Attack' A surprise attack results in the Alliance carrier engaging the device without planning, just to escape. They arrived somewhere in Pearl and the next beacon, placed near Research Alpha, requires the player to have at least 15 units of platinum in their cargo bay. Beacon 4 - 'Reducing Power' This beacon describes an attempt to reduce the power to the device to see if it could be better controlled. A successful test resulted in a jump to nearby Rucker where the next beacon is placed near the star in that system. It is set to activate if the player is flying a Striker class frame. Beacon 5 - 'Range Control' The research team had successfully learned to control the device's range and they travelled to Sierra as part of their next test. The next beacon is placed on the surface of the planet near the X coordinate -50000 on the permanent night side. The player is instructed to make sure they boost power to their shield system to avoid the crushing pressure of the planet's atmosphere. The beacon will activate when it detects at least 15 biological units in the player's cargo bay. Beacon 6 - 'Star Links' Here the team discovered a common link with the symbols on the device and the systems they were travelling through. The symbols were apparently star class types. This discovery let the team select a destination by lining up a system's star class with a symbol. Their next test took them to Orion where the next beacon is placed inside an asteroid there. The beacon is set to activate if it detects a fuel converter installed on the player's ship. Beacon 7 - 'First Controlled Test' A specific destination was entered in the device and the carrier successfully arrived in Deneb. The next beacon is placed on the surface near the Y coordinate 1450. The beacon will activate if it detects an Excalibur missile pack installed on the player's ship. Beacon 8 - 'Vonari Secret' Other symbols were present on the device and represented more distant locations. A test with one of them took the carrier to the Vonari home system, bypassing the previous long distance route through RiftSpace. The Alliance established a hidden base in this system and instructed the crew of the carrier to continue with their tests. The next beacon is placed one sector to the right of the hidden base and will activate when it detects an active stealth device. Beacon 9 - 'Lost in Deep Space' The research team activates the next alternate symbol and at this point, all communication with the ship is lost. A massive distortion in space is created and the carrier is pulled into it. The distortion eventually forms a black hole, which the player must figure out a way to use in order to proceed to the next location. The black hole is located 20 sectors up on the SZ coordinate. Beacon 10 - 'Andromeda' This beacon displays a summary of events surrounding the rescue of the carrier's crew and how they returned home. A hint is given that there may be more to this system than first appears and informs the player that the carrier has valuable parts on it. Beacon Quest Walkthrough (Hunt for RiftSpace) Beacon 1 - 'Rings of ice hide from the light.' Located on the planet Sapphire. The clue points to the icy rings of the planet Glacia. Hiding from the light indicates the next beacon is on the dark side of the planet, away from the system's star. Some free commodities are available in containers nearby (watch for the purple blip on the 3D radar). Beacon 2 - 'Between Cygnus and Olympus Prime, lost in a sea of blue.' The clue indicates the next beacon is in the Fauston system, between Cygnus and Olympus Prime. This can be seen by viewing the quadrant map. 'Lost in a sea of blue' indicates the beacon is located in the large blue nebula cloud in Fauston. Beacon 3 - 'Paired with Onyx -> _n _he f__e o_ _i_e_.' This partial clue needs to be combined with the beacon clue in Onyx. This part of the message contains about half of the characters for the clue 'In the fire of Pices.' Beacon 4 - 'Paired with Fauston -> I_ t__ _ir_ _f p_c_s.' This partial clue needs to be combined with the beacon clue in Fauston. This part of the message contains about half of the characters for the clue 'In the fire of Pices.' Beacon 5 - 'senots piks tnod, rekcur, \/ 2, 10200, 9250, 10050' This clue has two parts, the first is a sentence written backwards, 'rucker, don't skip stones.' Once in the Rucker system, the second part of the clue applies and are coordinates for the next beacon. The '\/ 2' part indicates you need to travel 2 sectors down from the central Rucker sector, then travel to the coordinates 10200, 9250, 10050. Beacon 6 - 'slot ni eth dovi, FAAAA JFAA FAAAA' This clue includes a scrambled sentence and coded coordinates. The sentence is 'lost in the void' and the coordinates are 50000, 9500, 50000, represented by each letter starting with A for 0. This is the one clue that doesn't point directly to another beacon, but instead a wormhole to the area described as 'the void.' Once in the void area, you must look around in all directions to locate the next beacon. Beacon 7 - 'Given to Sirius, hidden in the 'base'.' This clue includes multiple definitions of the word 'base.' Not only is the beacon at the base in Sirius, but it is at the 'base' of the base. Beacon 8 - 'Gateway is near, verdant negative guides the way.' This clue indicates the quest is almost finished. Verdant is the color green and indicates the next system to travel to is Emerald. Verdant negative indicates that the last beacon is located at the negative coordinates of 'verdant', or the planet Emerald. Beacon 9 - 'E L T O S R (+)' This is the last and most challenging clue. ELTOSR indicates all of the charted systems in the lower left section of the Evochron Quadrant, Emerald, Lambda, Thuban, Orion, Sirius, and Rigel. The (+) symbol indicates that the gateway is located in the middle of the circle formed by the listed systems. However, careful calculations need to be done to obtain the correct location. Just averaging the values will not provide the right sector coordinates, the vertical offset of -400 for Lambda needs to be taken into consideration. Also, focus should be given to the absolute edge of the circular shape formed by the systems, not just an average of all of the coordinates.
|